Automation is something that I have tried to incorporate as much as possible within my solutions. The benefits are obvious and often the work behind it is the most interesting, even if it ends up being just a few lines of PowerShell. Infrastructure as Code is one of the areas I have had on my to-do list for a while and I have finally started dipping my toe into it this year.
I’ve discussed previously how I like to handle deploying appliances and VMs using PowerCLI and an existing VM template but I want to take that a stage further and create a template using code. I’ve used HashiCorp packer here to help me achieve that.
This example creates a vanilla Windows 2019 VM, applies updated patches, and then converts it into a template. Hopefully, this shows the benefits and potential of IaC. I am by no means an expert in this area and there are certainly nicer or more efficient ways to achieve but this was my (homelab) journey.
Gather Your Tools
There are various downloads/ISOs/config files that are required to get going here which I have covered below.
The Chocolatey Way…
As I’m doing this on a Windows client and I’ve found that a great way to deploy applications quickly is by using Chocolatey – a package manager for Windows. If you have not come across this you should definitely check it out – it’s super useful. But I have also provided the links for documentation to do this without it.
Download a windows server iso – I’m using 2019 – eval version download here
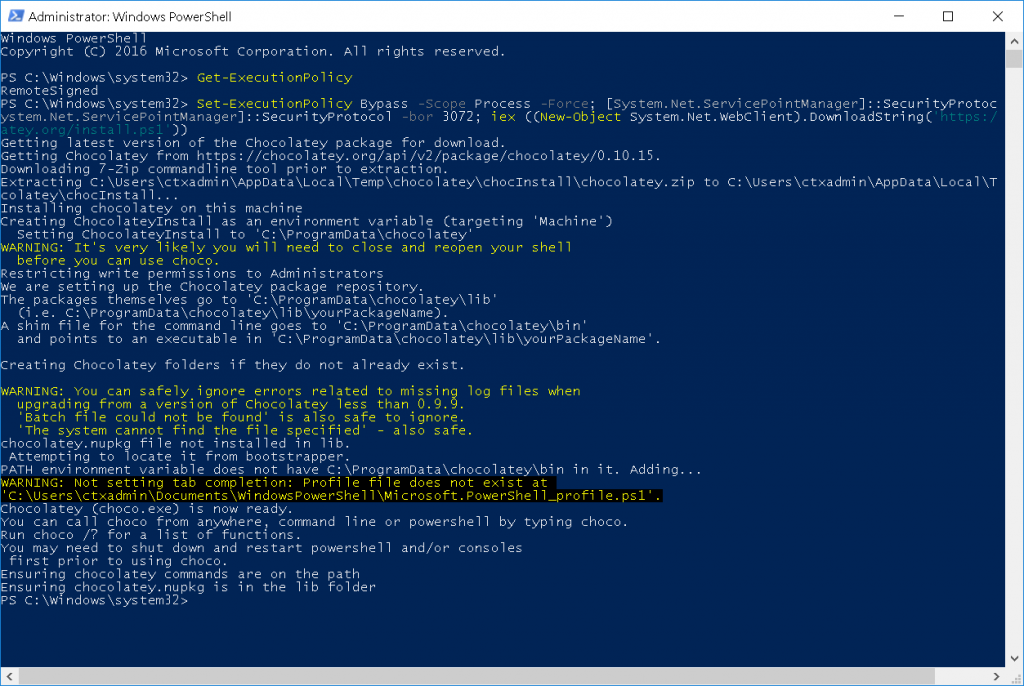
Run the below Powershell in an Admin session. I’ve added a few extra tools that may prove useful but the critical ones are the 2 packer packages.
Set-ExecutionPolicy Bypass -Scope Process -Force; [System.Net.ServicePointManager]::SecurityProtocol = [System.Net.ServicePointManager]::SecurityProtocol -bor 3072; iex ((New-Object System.Net.WebClient).DownloadString('https://chocolatey.org/install.ps1'))
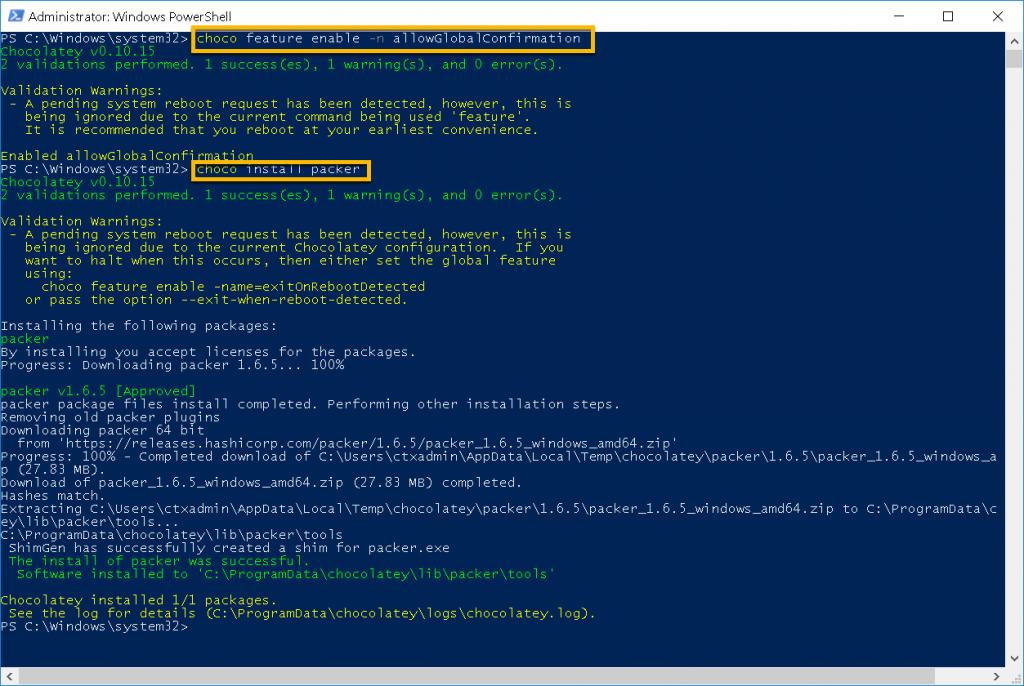
choco feature enable -n allowGlobalConfirmation
choco install packer
choco install packer-provisioner-windows-update
choco install googlechrome
choco install firefox
choco install postman
choco install winscp
choco install putty
choco install vscode
Packer install docs are here
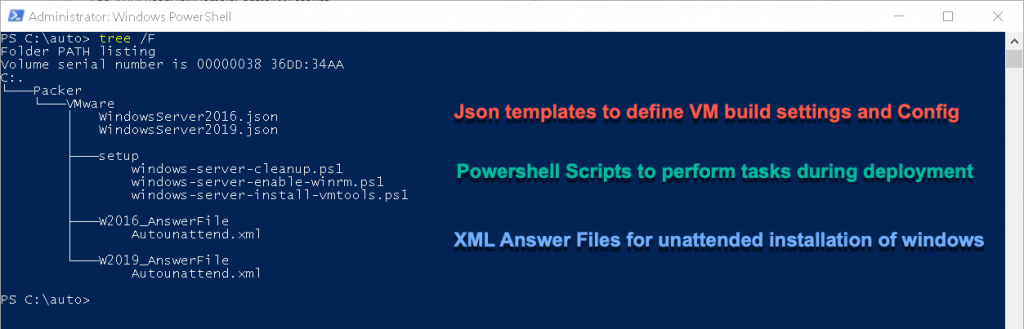
Further packer documentation provides the example configs on GitHub here where you can obtain the required config files as a starting point. You will need these. I’ve recreated a similar folder structure and edited/added the files for my requirements which I will talk through the thinking behind below. The powershell scripts that I have used are available if you want to use them.
Scripts originated from the below which are both well worth your time.
https://github.com/rainpole/packer-vsphere
Configuration
I am going to be using the packer vsphere-iso builder, all the options and syntax are documented here. There are a multitude of alternative builders to play with but I have stepped through my Windows2019 template below to give some idea of functionality.
Now we have the builder config we can turn our attention to the answer file to enable the unattended installation of the Windows OS.
My autounattend.xml is below but you should create your own from either the Packer examples or generate one from the Windows Answer File Generator
<?xml version="1.0" encoding="utf-8"?>
<unattend xmlns="urn:schemas-microsoft-com:unattend">
    <settings pass="windowsPE">
        <component name="Microsoft-Windows-International-Core-WinPE" processorArchitecture="amd64" publicKeyToken="31bf3856ad364e35" language="neutral" versionScope="nonSxS" xmlns:wcm="http://schemas.microsoft.com/WMIConfig/2002/State" xmlns:xsi="http://www.w3.org/2001/XMLSchema-instance">
            <UILanguage>en-US</UILanguage>
        </component>

        <component name="Microsoft-Windows-PnpCustomizationsWinPE" processorArchitecture="amd64" publicKeyToken="31bf3856ad364e35" language="neutral" versionScope="nonSxS" xmlns:wcm="http://schemas.microsoft.com/WMIConfig/2002/State" xmlns:xsi="http://www.w3.org/2001/XMLSchema-instance">
            <DriverPaths>
                <PathAndCredentials wcm:action="add" wcm:keyValue="A">
                    <!-- pvscsi-Windows8.flp -->
                    <Path>B:\</Path>
                </PathAndCredentials>
            </DriverPaths>
        </component>

        <component name="Microsoft-Windows-Setup" processorArchitecture="amd64" publicKeyToken="31bf3856ad364e35" language="neutral" versionScope="nonSxS" xmlns:wcm="http://schemas.microsoft.com/WMIConfig/2002/State" xmlns:xsi="http://www.w3.org/2001/XMLSchema-instance">
            <UserData>
                <AcceptEula>true</AcceptEula>

                <!-- Retail image requires a key
                <ProductKey>
                    <Key>XXXXX-XXXXX-XXXXX-XXXXX-XXXXX</Key>
                </ProductKey>
                -->
            </UserData>

            <ImageInstall>
                <OSImage>
                    <InstallFrom>
                        <MetaData wcm:action="add">
                            <Key>/IMAGE/NAME</Key>
                            <Value>Windows Server 2019 SERVERSTANDARD</Value>
                        </MetaData>
                    </InstallFrom>
                    <InstallToAvailablePartition>true</InstallToAvailablePartition>
                </OSImage>
            </ImageInstall>

            <DiskConfiguration>
                <Disk wcm:action="add">
                    <DiskID>0</DiskID>
                    <CreatePartitions>
                        <CreatePartition wcm:action="add">
                            <Order>1</Order>
                            <Extend>true</Extend>
                            <Type>Primary</Type>
                        </CreatePartition>
                    </CreatePartitions>
                </Disk>
            </DiskConfiguration>
        </component>
    </settings>

    <settings pass="offlineServicing">
        <component name="Microsoft-Windows-LUA-Settings" processorArchitecture="amd64" publicKeyToken="31bf3856ad364e35" language="neutral" versionScope="nonSxS" xmlns:wcm="http://schemas.microsoft.com/WMIConfig/2002/State" xmlns:xsi="http://www.w3.org/2001/XMLSchema-instance">
            <!-- Disable user account control -->
            <EnableLUA>false</EnableLUA>
        </component>
    </settings>

    <settings pass="specialize">
        <component name="Microsoft-Windows-Deployment" processorArchitecture="amd64" publicKeyToken="31bf3856ad364e35" language="neutral" versionScope="nonSxS" xmlns:wcm="http://schemas.microsoft.com/WMIConfig/2002/State" xmlns:xsi="http://www.w3.org/2001/XMLSchema-instance">
        </component>
    </settings>

    <settings pass="oobeSystem">
        <component name="Microsoft-Windows-International-Core" processorArchitecture="amd64" publicKeyToken="31bf3856ad364e35" language="neutral" versionScope="nonSxS" xmlns:wcm="http://schemas.microsoft.com/WMIConfig/2002/State" xmlns:xsi="http://www.w3.org/2001/XMLSchema-instance">
            <SystemLocale>en-US</SystemLocale>
        </component>

        <component name="Microsoft-Windows-Shell-Setup" processorArchitecture="amd64" publicKeyToken="31bf3856ad364e35" language="neutral" versionScope="nonSxS" xmlns:wcm="http://schemas.microsoft.com/WMIConfig/2002/State" xmlns:xsi="http://www.w3.org/2001/XMLSchema-instance">
            <OOBE>
                <!-- Privacy settings -->
                <ProtectYourPC>3</ProtectYourPC>
                <HideLocalAccountScreen>true</HideLocalAccountScreen>
            </OOBE>

            <!--
            <TimeZone>GMT Standard Time</TimeZone>
            -->

            <UserAccounts>
                <LocalAccounts>
                    <LocalAccount wcm:action="add">
                        <Name>localuser</Name>
                        <Password>
                            <Value>SomeSecurePW1!</Value>
                            <PlainText>true</PlainText>
                        </Password>
                        <Group>Administrators</Group>
                    </LocalAccount>
                </LocalAccounts>
            </UserAccounts>

            <AutoLogon>
                <Enabled>true</Enabled>
                <Username>localuser</Username>
                <Password>
                    <Value>SomeSecurePW1!</Value>
                    <PlainText>true</PlainText>
                </Password>
                <LogonCount>1</LogonCount>
            </AutoLogon>
            <FirstLogonCommands>
            <SynchronousCommand wcm:action="add">
               <CommandLine>%SystemRoot%\system32\WindowsPowerShell\v1.0\powershell.exe -Command "Set-ExecutionPolicy -ExecutionPolicy RemoteSigned -Force"</CommandLine>
               <Description>Set Execution Policy 64-Bit</Description>
               <Order>1</Order>
               <RequiresUserInput>true</RequiresUserInput>
            </SynchronousCommand>
            <SynchronousCommand wcm:action="add">
               <CommandLine>%SystemRoot%\system32\WindowsPowerShell\v1.0\powershell.exe -Command "Set-ExecutionPolicy -ExecutionPolicy RemoteSigned -Force"</CommandLine>
               <Description>Set Execution Policy 32-Bit</Description>
               <Order>2</Order>
               <RequiresUserInput>true</RequiresUserInput>
            </SynchronousCommand>
            <SynchronousCommand wcm:action="add">
               <CommandLine>%SystemRoot%\system32\WindowsPowerShell\v1.0\powershell.exe -File a:\windows-server-install-vmtools.ps1</CommandLine>
               <Order>3</Order>
               <Description>Install VMware Tools</Description>
            </SynchronousCommand>
            <SynchronousCommand wcm:action="add">
               <CommandLine>%SystemRoot%\system32\WindowsPowerShell\v1.0\powershell.exe -File a:\windows-server-enable-winrm.ps1</CommandLine>
               <Order>4</Order>
               <Description>Enable Windows Remote Management</Description>
            </SynchronousCommand>
            </FirstLogonCommands>
        </component>
    </settings>
</unattend>
I’m running 2 powershell scripts at the end of the answer file to install VMtools and enable winrm which will be required for packer to finish the deployment using the winrm communicator. These scripts are called from the virtual floppy drive as defined in the json file (I explain that in the video).
Now that we have the config files in place we can try the build. Run the following command and watch it go. My deployment takes a shade under 2 hours. Most of that is downloading updates and software.
packer build WindowsServer2019.json
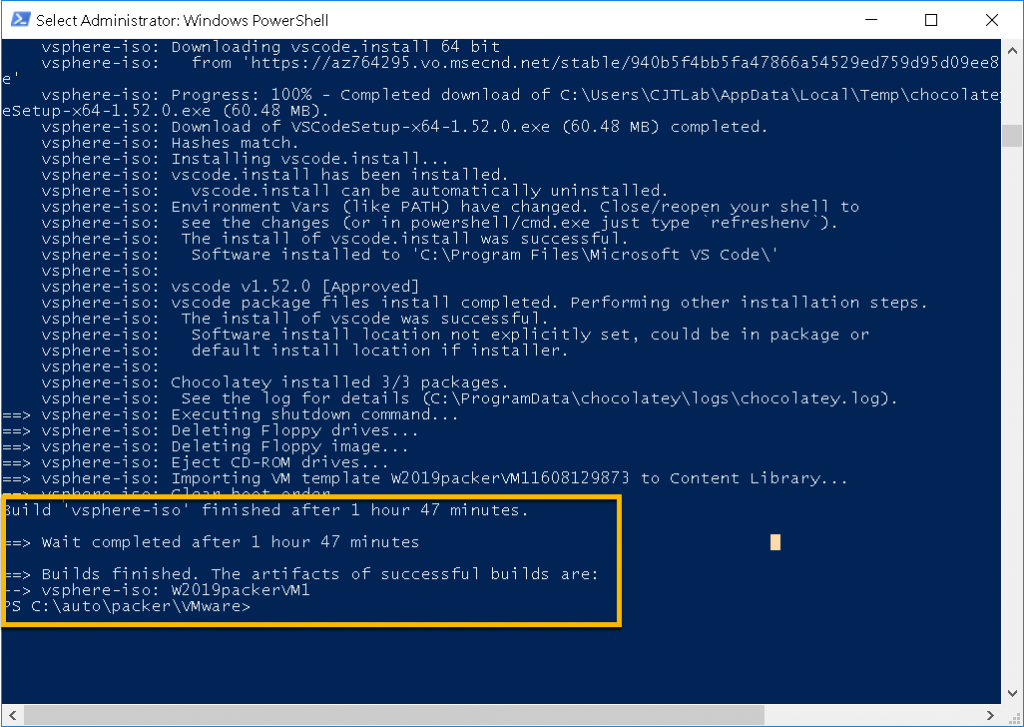
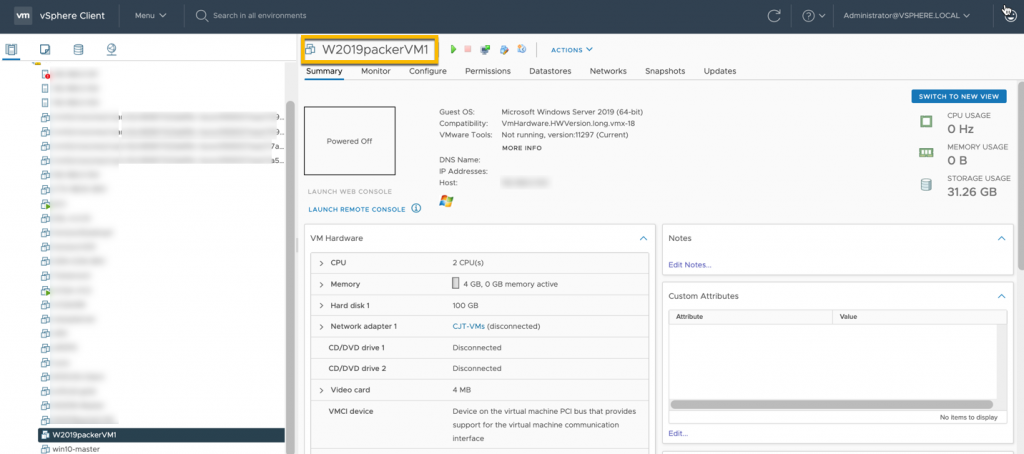
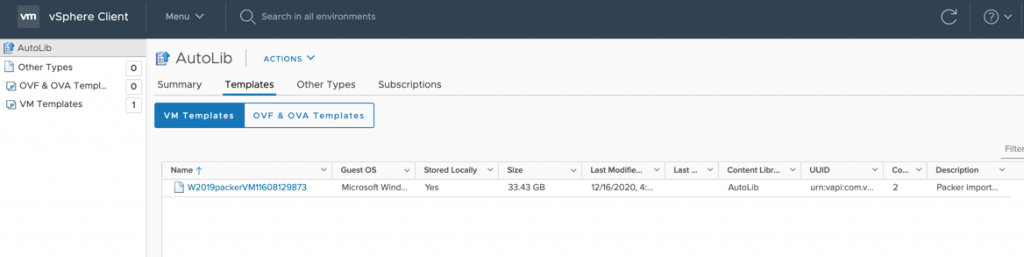
I am left with a shutdown VM and shiny new VM template in my content library!
I did have some issues getting this up and running mainly around the answer file so ensure that the syntax is sound and you have the correct operating system version in there.
I also had some inconsistent authentication timeouts that were resolved when I ran the deployment from a wired connection so am putting that down to home wifi!
So now I have an automated way of building an up to date VMware template. Next stage will be adding additional VM customisation and further software deployment. Sounds like I’ll need a part 2…..