I have had to deploy vCenter many times over recent months and I keep meaning to try out the CLI command method provided to do so silently (and repeatedly). I have finally got around to writing this up.
Tools required are the VCSA iso from VMware download here and the preparation of a .json file that defines all your configuration. Oh, and a mac or windows client to run it from. I am using Windows in this example but have used the same process on a mac.
Whilst you can also perform an upgrade or migration this way I needed a fresh deployment of vCenter 7, VMware’s official documentation for this can be found here
We start by creating a template (json) – pick the example that is required in the relevant section of the iso.
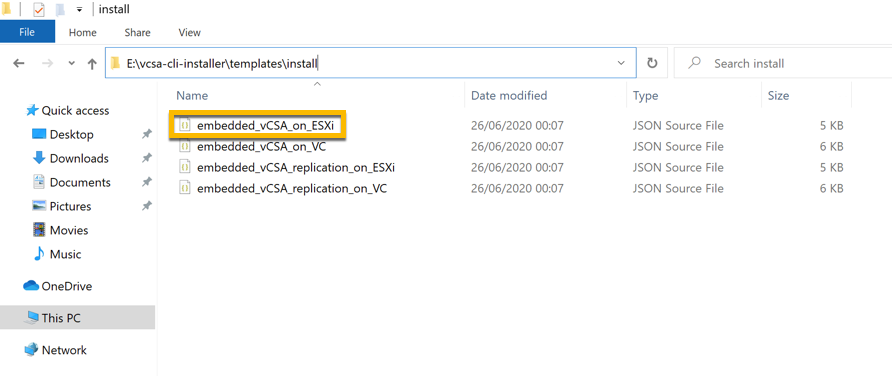
I copied out the embedded_vCSA_on_ESXi .json file and changed it for my needs. The example for my lab environment is below and hopefully pretty self-explanatory. I have highlighted the settings that require attention.
{
    "__version": "2.13.0",
    "__comments": "Sample template to deploy a vCenter Server Appliance with an embedded Platform Services Controller on an ESXi host.",
    "new_vcsa": {
        "esxi": {
            "hostname": "192.168.0.103",
            "username": "root",
            "password": "esxirootpassword",
            "deployment_network": "VM Network",
            "datastore": "vsanDatastore"
        },
        "appliance": {
            "__comments": [
                "You must provide the 'deployment_option' key with a value, which will affect the vCenter Server Appliance's configuration parameters, such as the vCenter Server Appliance's number of vCPUs, the memory size, the storage size, and the maximum numbers of ESXi hosts and VMs which can be managed. For a list of acceptable values, run the supported deployment sizes help, i.e. vcsa-deploy --supported-deployment-sizes"
            ],
            "thin_disk_mode": true,
            "deployment_option": "tiny",
            "name": "VCSA10"
        },
        "network": {
            "ip_family": "ipv4",
            "mode": "static",
            "system_name": "vc10.cjtlab.com",
            "ip": "192.168.0.180",
            "prefix": "24",
            "gateway": "192.168.0.1",
            "dns_servers": [
                "192.168.0.110"
            ]
        },
        "os": {
            "password": "VCSArootpassword",
            "ntp_servers": "uk.pool.ntp.org",
            "ssh_enable": true
        },
        "sso": {
            "password": "SSOpassword",
            "domain_name": "vsphere.local"
        }
    },
    "ceip": {
        "description": {
            "__comments": [
                "++++VMware Customer Experience Improvement Program (CEIP)++++",
                "VMware's Customer Experience Improvement Program (CEIP) ",
                "provides VMware with information that enables VMware to ",
                "improve its products and services, to fix problems, ",
                "and to advise you on how best to deploy and use our ",
                "products. As part of CEIP, VMware collects technical ",
                "information about your organization's use of VMware ",
                "products and services on a regular basis in association ",
                "with your organization's VMware license key(s). This ",
                "information does not personally identify any individual. ",
                "",
                "Additional information regarding the data collected ",
                "through CEIP and the purposes for which it is used by ",
                "VMware is set forth in the Trust & Assurance Center at ",
                "http://www.vmware.com/trustvmware/ceip.html . If you ",
                "prefer not to participate in VMware's CEIP for this ",
                "product, you should disable CEIP by setting ",
                "'ceip_enabled': false. You may join or leave VMware's ",
                "CEIP for this product at any time. Please confirm your ",
                "acknowledgement by passing in the parameter ",
                "--acknowledge-ceip in the command line.",
                "++++++++++++++++++++++++++++++++++++++++++++++++++++++++++++++"
            ]
        },
        "settings": {
            "ceip_enabled": false
        }
    }
}
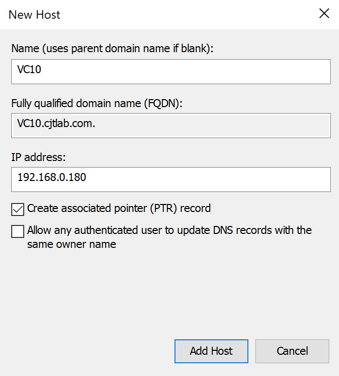
As ever with vCenter it is vital that DNS is working correctly so create the host record with PTR and test resolution is working before starting the deployment.
Now we can run a couple of checks to make sure the syntax of the .json and communications are all OK.
vcsa-deploy.exe install --verify-template-only c:\automation\VC10.json
vcsa-deploy.exe install --no-ssl-certificate-verification --accept-eula --precheck-only c:\automation\VC10.json
When happy then we can progress to the deployment.
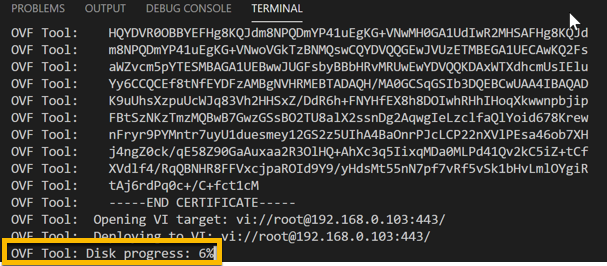
vcsa-deploy.exe install --no-ssl-certificate-verification --accept-eula c:\automation\VC10.json
We can see the progress in the command line and the webclient but when we have faith in it the idea is we don’t need to monitor it right?

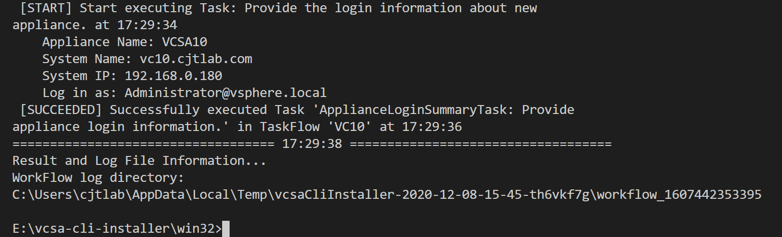
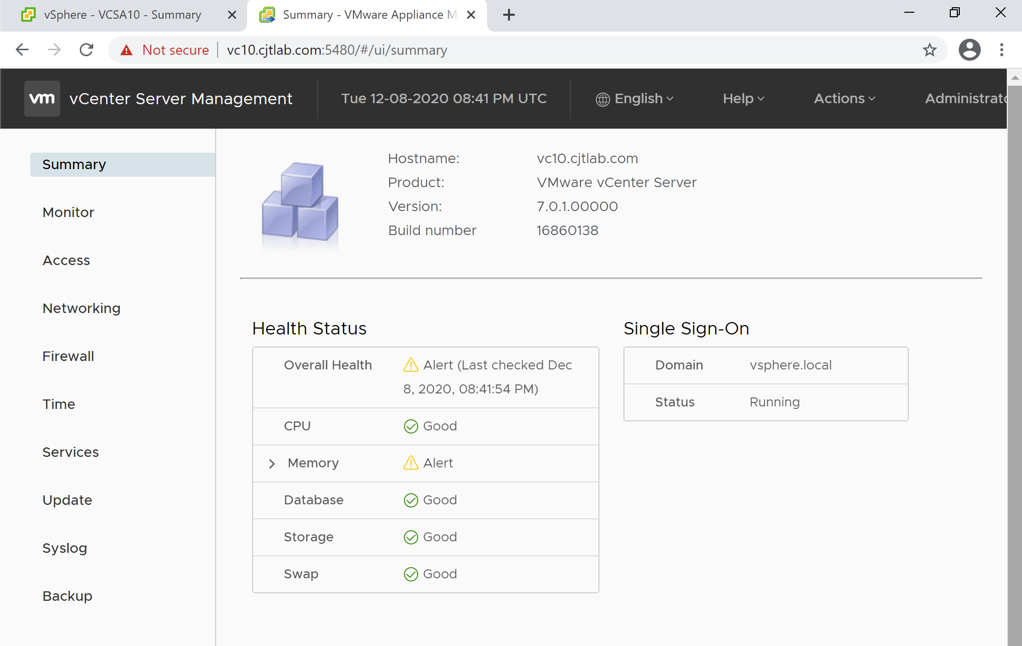
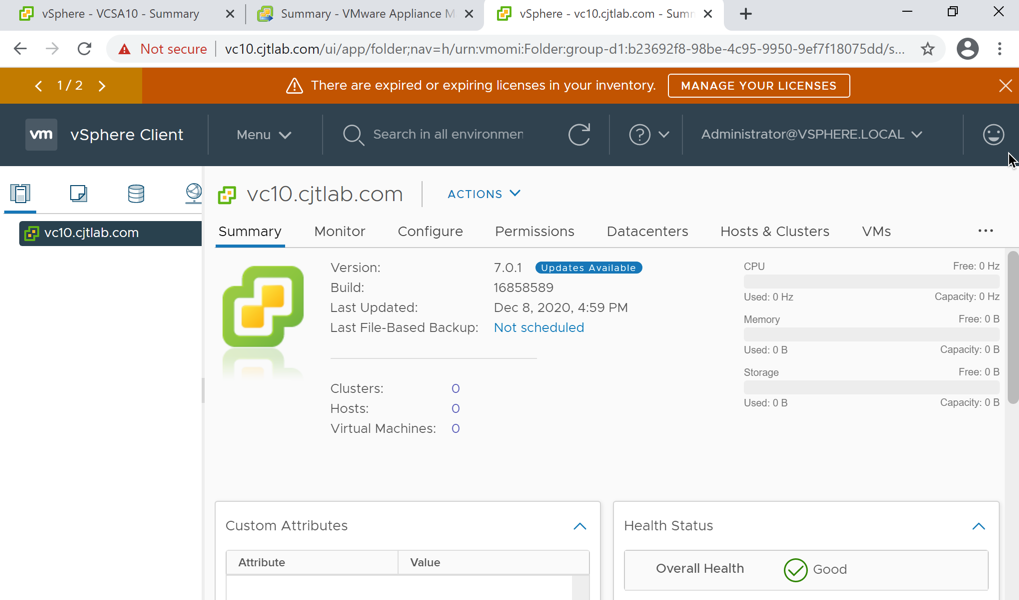
We can see that the appliance has deployed successfully and we can log onto the Management Pages.
I did not have any problems with this process and will certainly use it again to quickly deploy vCenter without having to navigate through the GUI. Perfect for repeatibility and the .json file can be retained for future repeat deployments/documentation.